RIMLESS
Mounting instructions
A. Disassembly
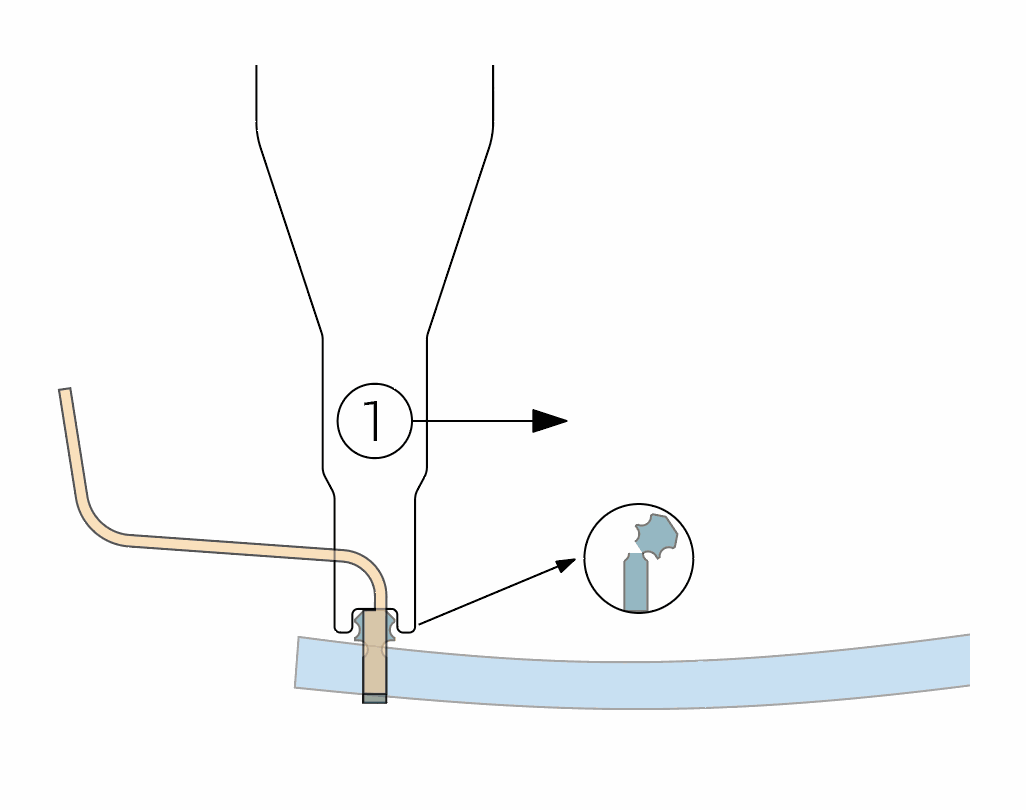
1. Using the multitool, break off the head of the nylon shim by applying pressure in the direction of the arrow.
note: to facilitate disassembly, start with end-pieces, and then the bridge.
2. With the other end of the multitool, push the rest of the shim out.
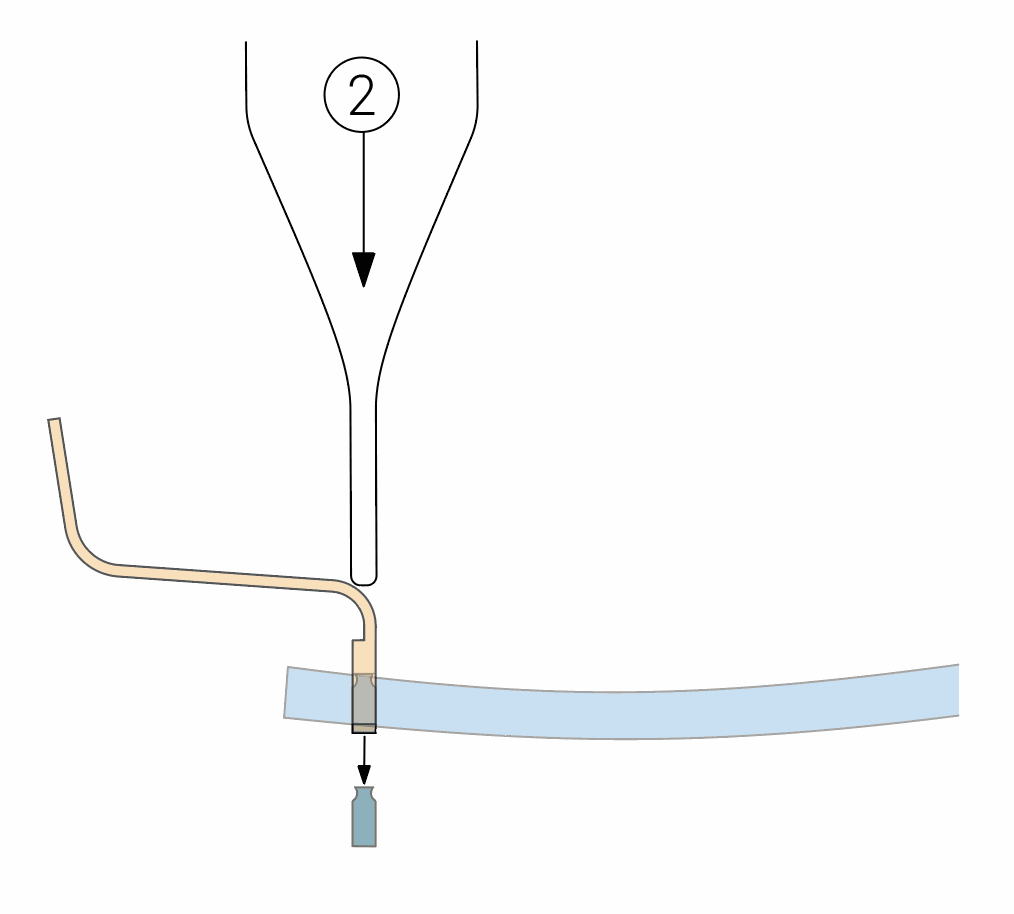
3. Pull the bridge and end-pieces out of the lenses from the inside.
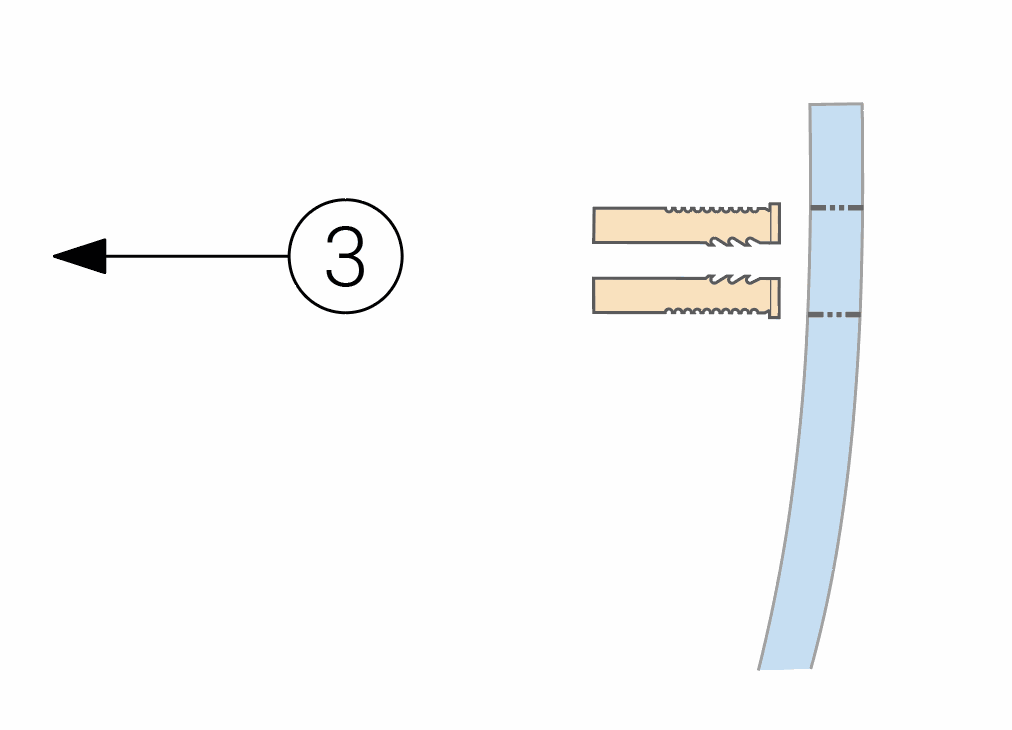
videO

B. Drilling
Download slotting coordinates HERE les coordonnées de perçage
1. Holes dimensions (mm):
lens thickness at the hole :
- minimum : 2.2 mm
- maximum : 4.5 mm
For the first few mountings, and depending on the grinder, a test glass may be necessary to adjust the drilling dimensions.
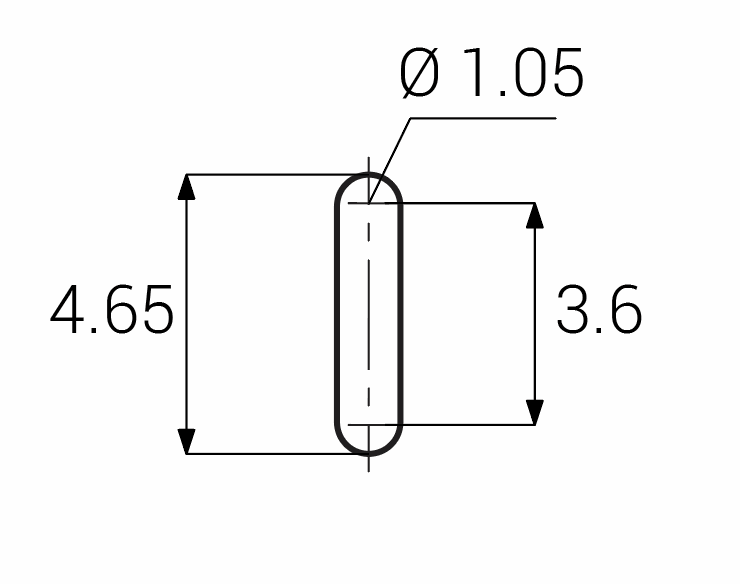
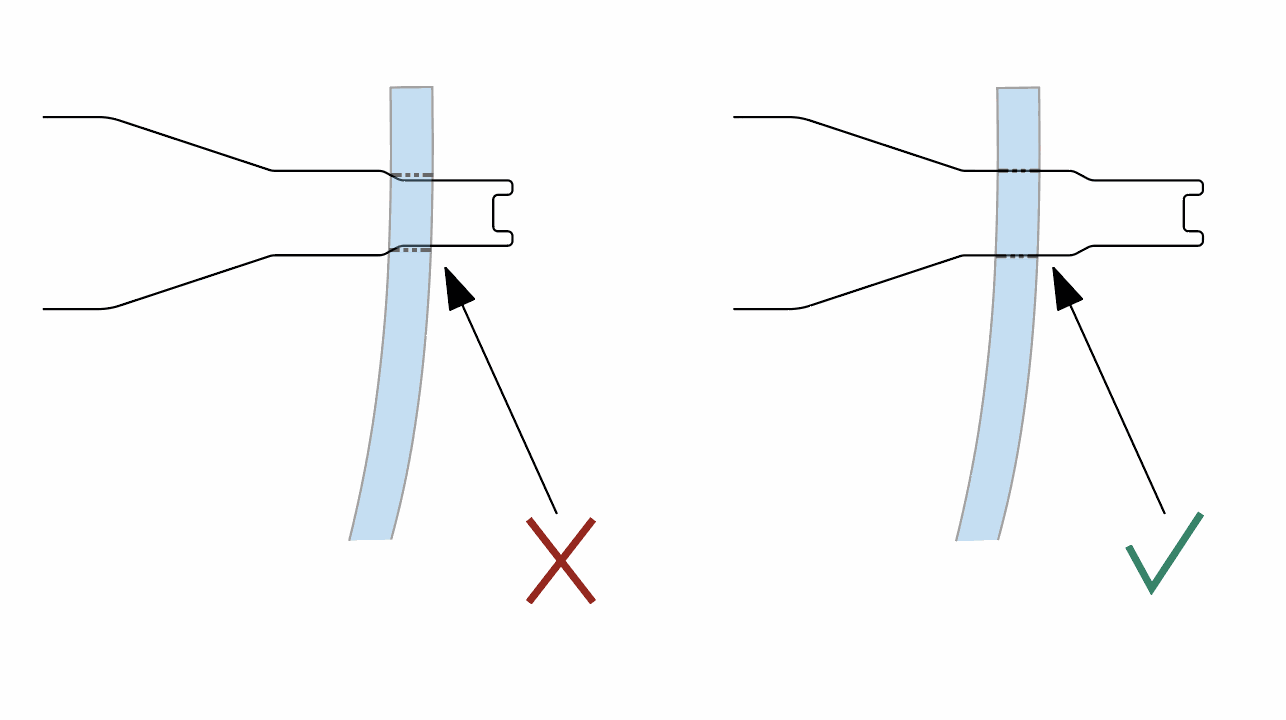
2. Using the multitool, check the size of the hole, and adjust if necessary.
note : the hole is shaped when the tool goes in easily, without forcing.

C. Groove coloring
For mounting without groove coloring, proceed to step D. Mounting
1. Recommended groove dimensions
- Width : 1 mm
- Depth : 0,6 mm
2. Add an acetone-based thinner up to 2/3 of the way up the bottle, mix with a stick and shake the bottle until the colour is fluid and homogenous.
Any acetone-based thinner will do. Adding some regularly as a preventive measure will prevent the colour from drying out too much.
If necessary, uncap the pipette with a pin.
Then apply the color with the pipette against the groove.
Gently squeeze the bottle and rotate the glass.
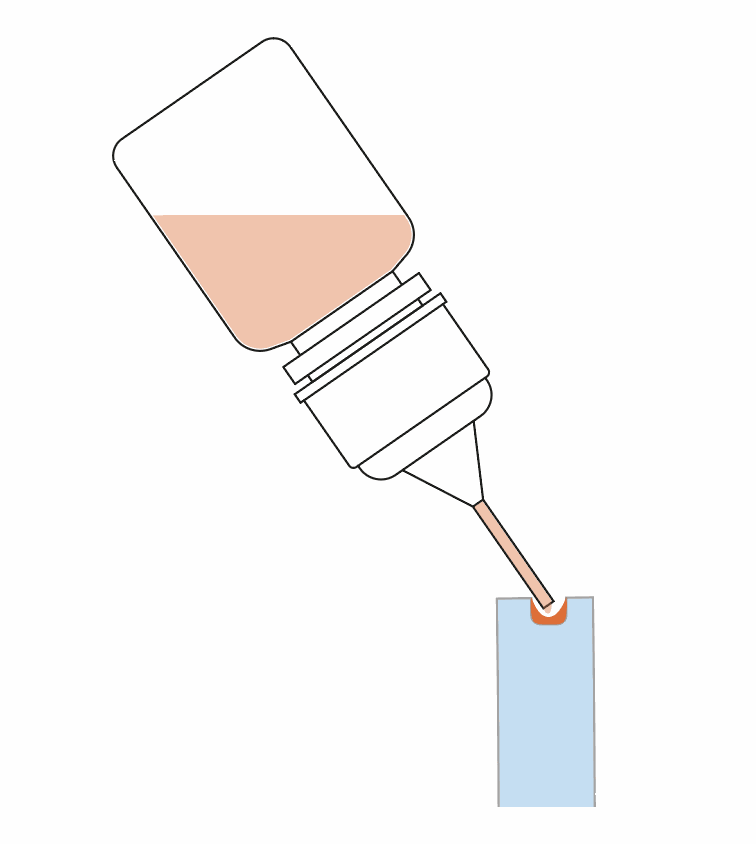
3. Clean excess color from the edge of the glass.
Gently clean the edge of the glass using a cloth dampened with a cleaning solution for marking inks or isopropyl alcohol.
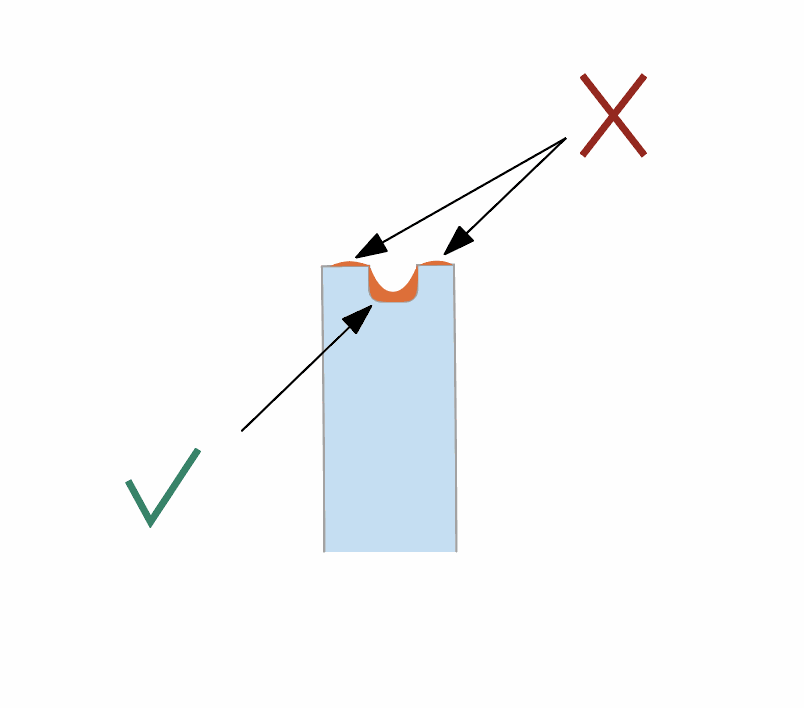
4. Allow to sit for the color to dry completely.
- Rimless : 20 minutes
- Rim : 36h
video
D. Assembly
1. Carefully insert the bridge or end-piece into the glass.
note: for ease of assembly, start with the bridge, then end-pieces.
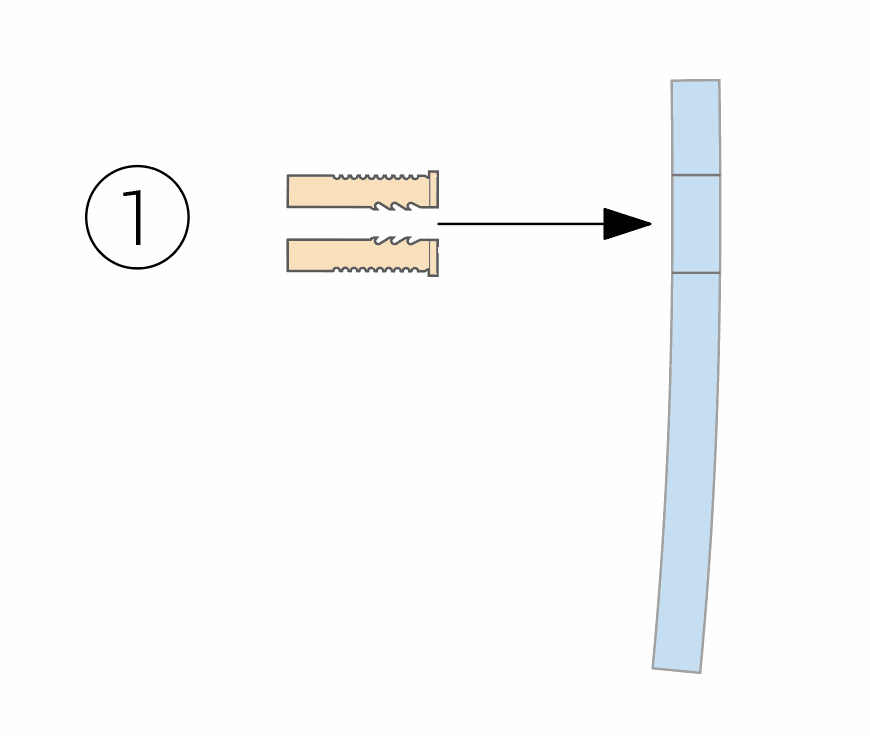
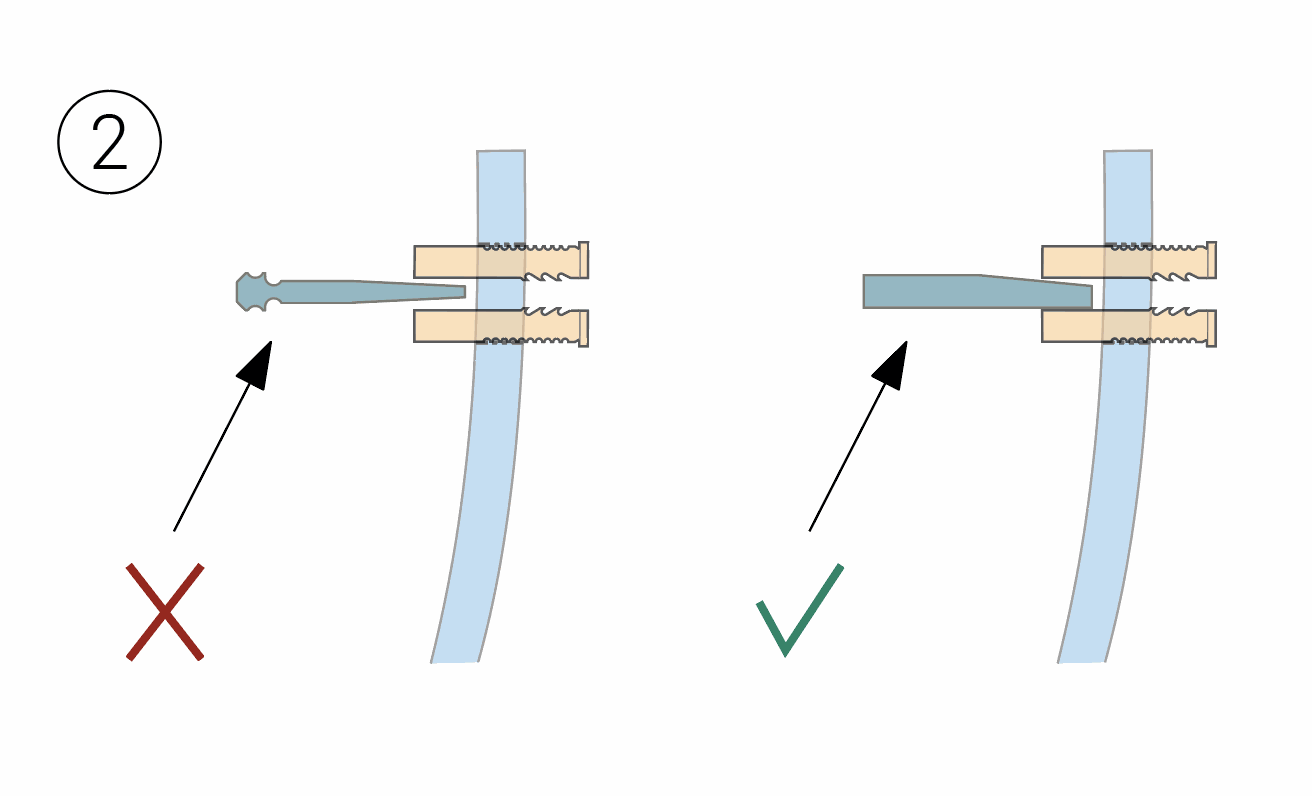
2. Insert the nylon shim between the pins from the inside.
The nylon shim must be inserted with the correct orientation (see diagram).
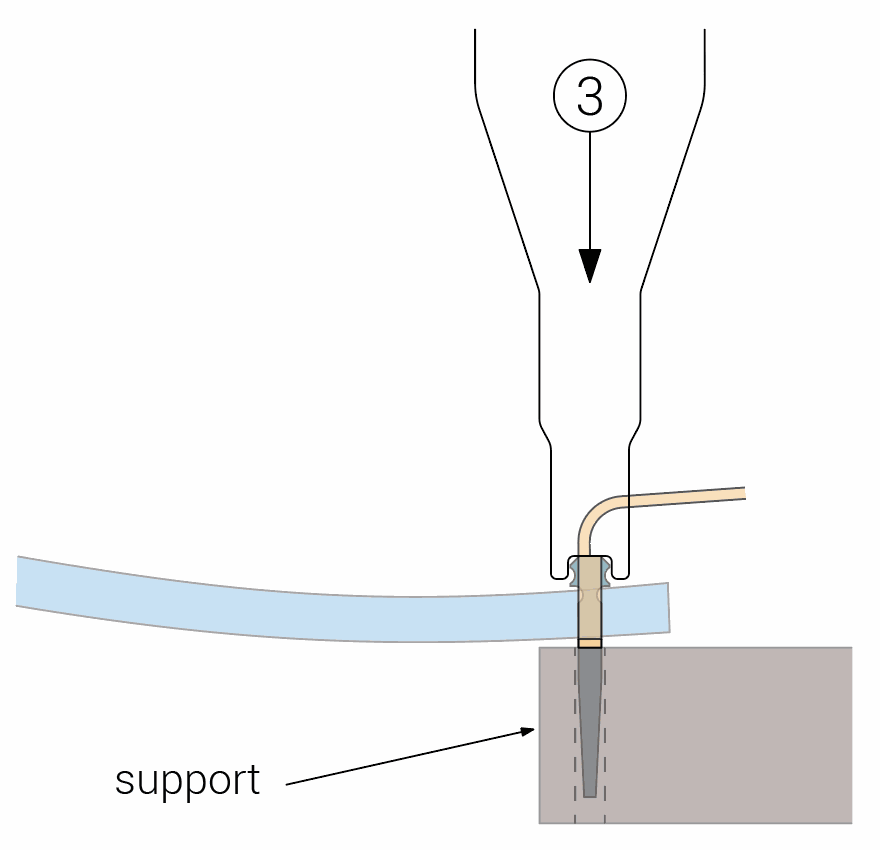
3. Using the multitool, press the shim until the head of the shim touches the glass.
Place the holder under the lens, and apply reasonable pressure vertically.
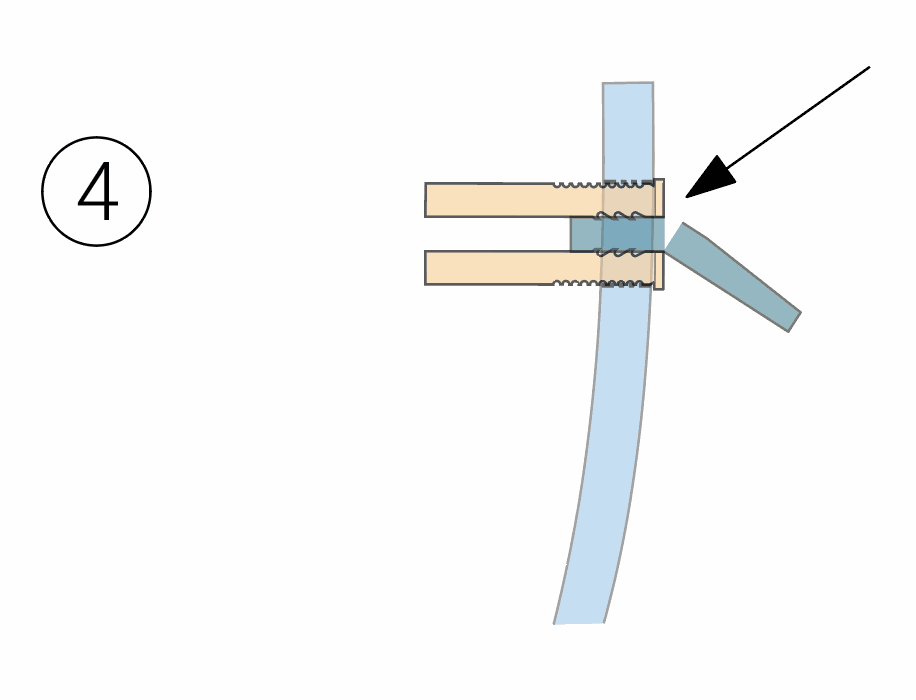
4. Using pliers or a cutter, cut the overhanging part of the nylon shim.
video
